Suppliers
In Jova POS, you can easily manage supplier data that provides products for your business. This allows you to record supplier contact information, supplier status, and their active status, as well as perform other actions. Follow these steps to manage your suppliers.
1. Adding a New Supplier
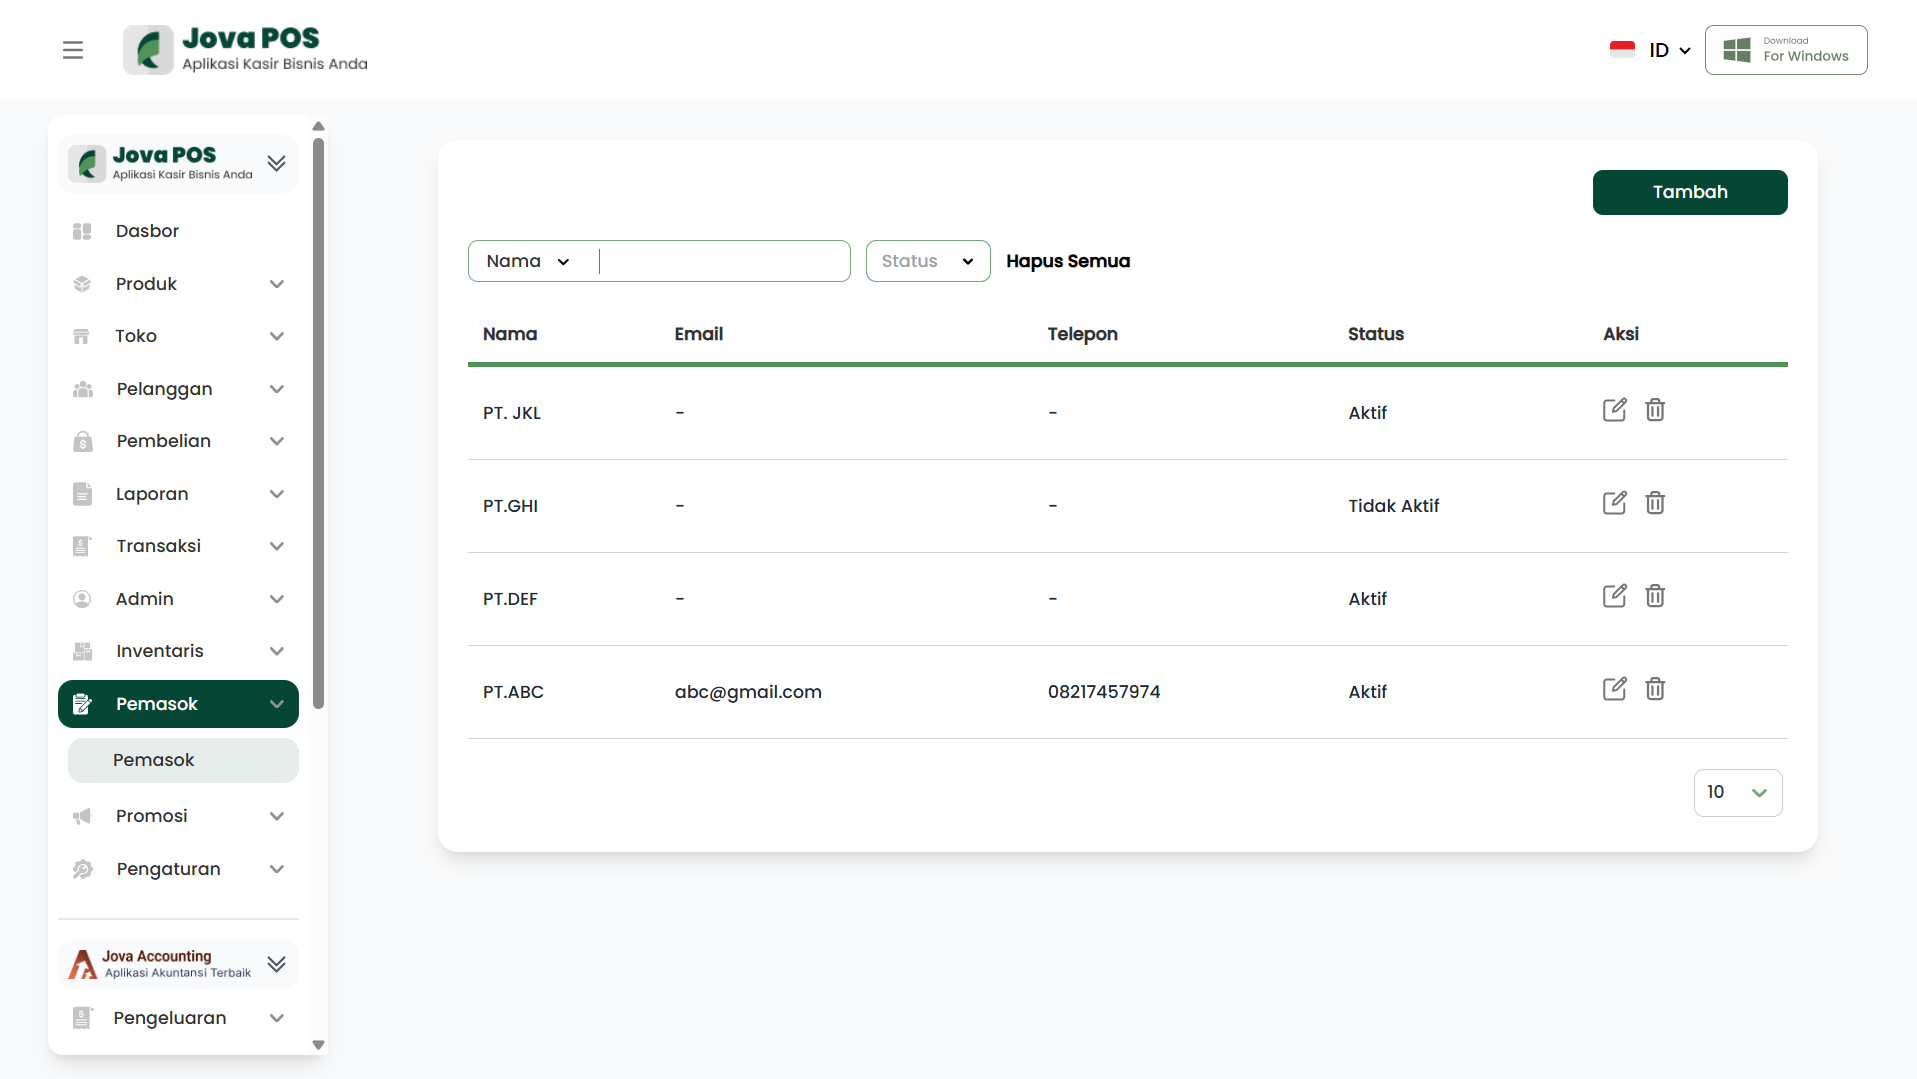
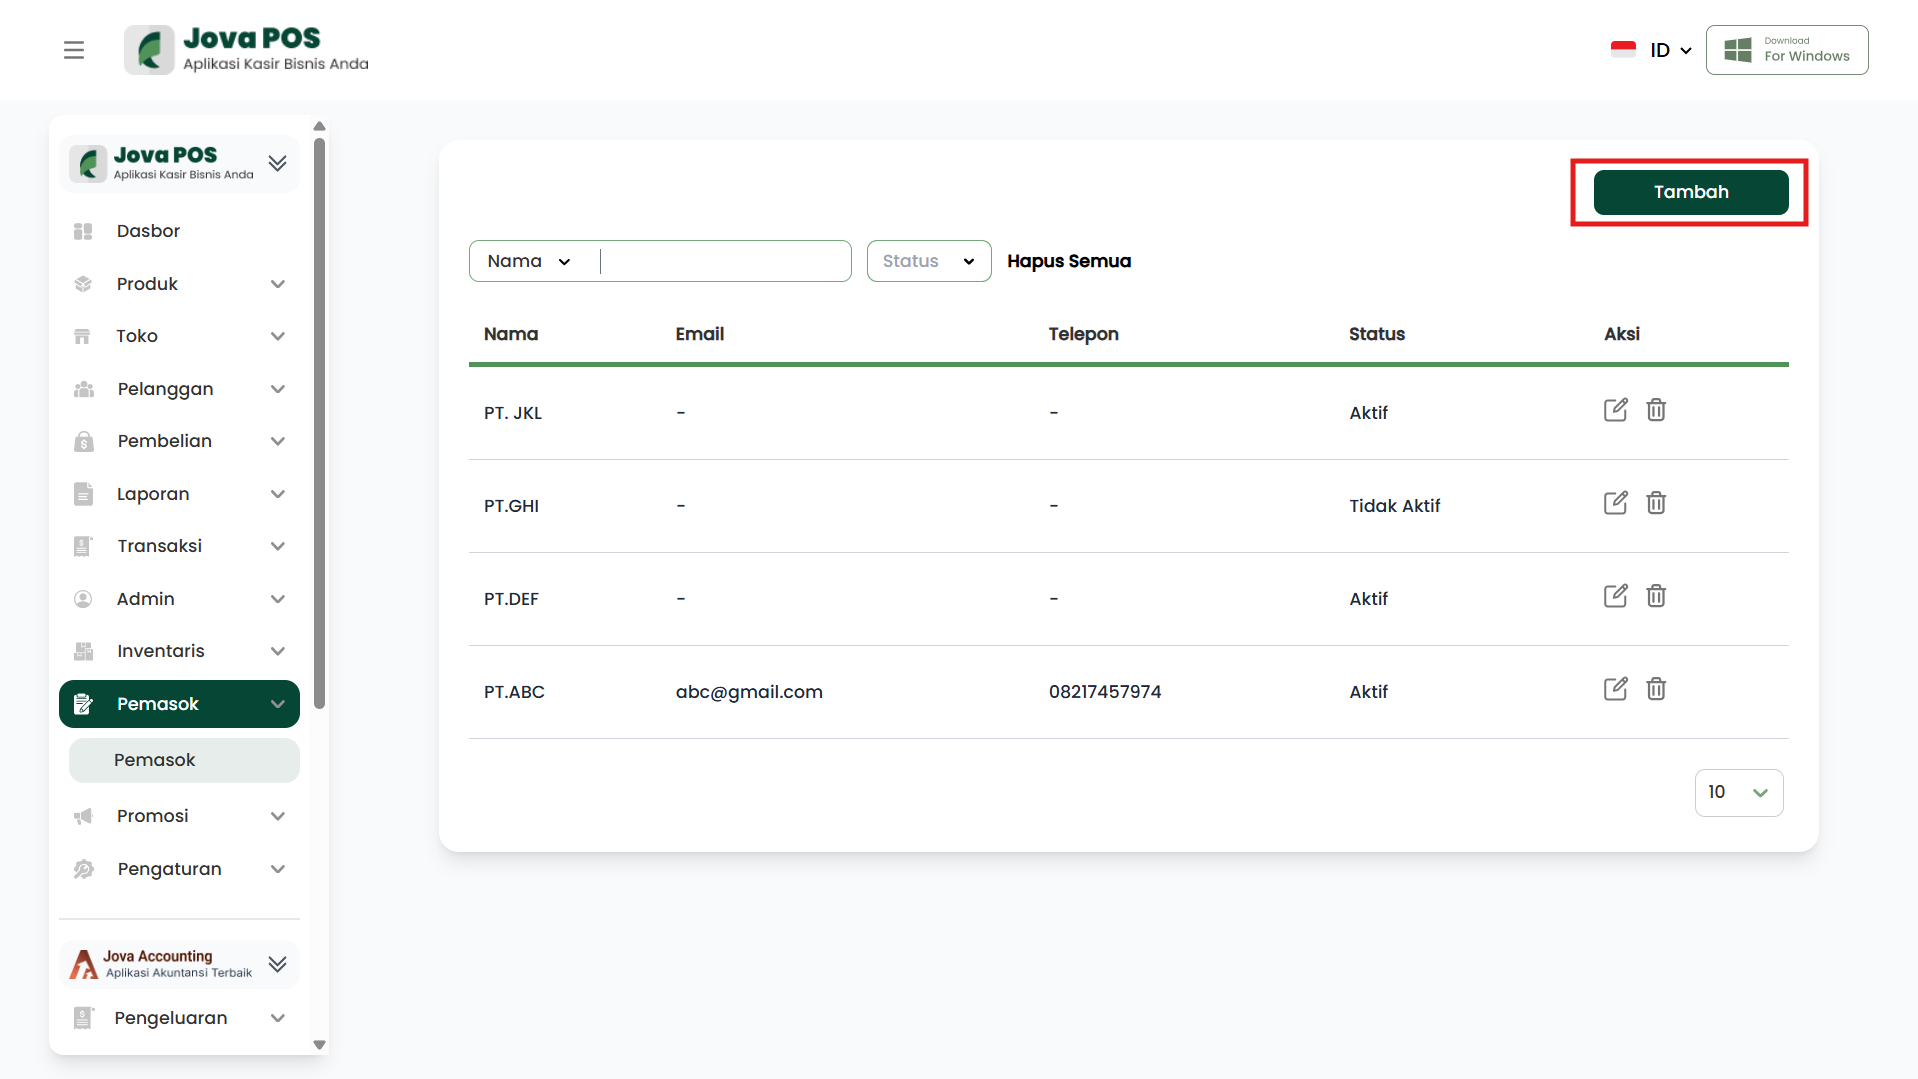
To add a new supplier to the system, click the Add button on the main Suppliers page.
Main Suppliers Page View:
Here you will see the Add button that allows you to enter new supplier data.
2. Filling in Supplier Data
After clicking Add, you will be asked to fill in information about the new supplier. Here are the fields to fill in:
- Name: The name of the supplier to be added.
- Email: The supplier's email address for communication.
- Phone: The supplier's phone number.
- Address: The complete supplier address for shipping or correspondence.
- Status: Determines whether the supplier is active or not. Select the appropriate status.
Example Supplier Data:
- Name: PT. COOL
- Email: cool@gmail.com
- Phone: 08123456789
- Address: Tiban
- Status: Active
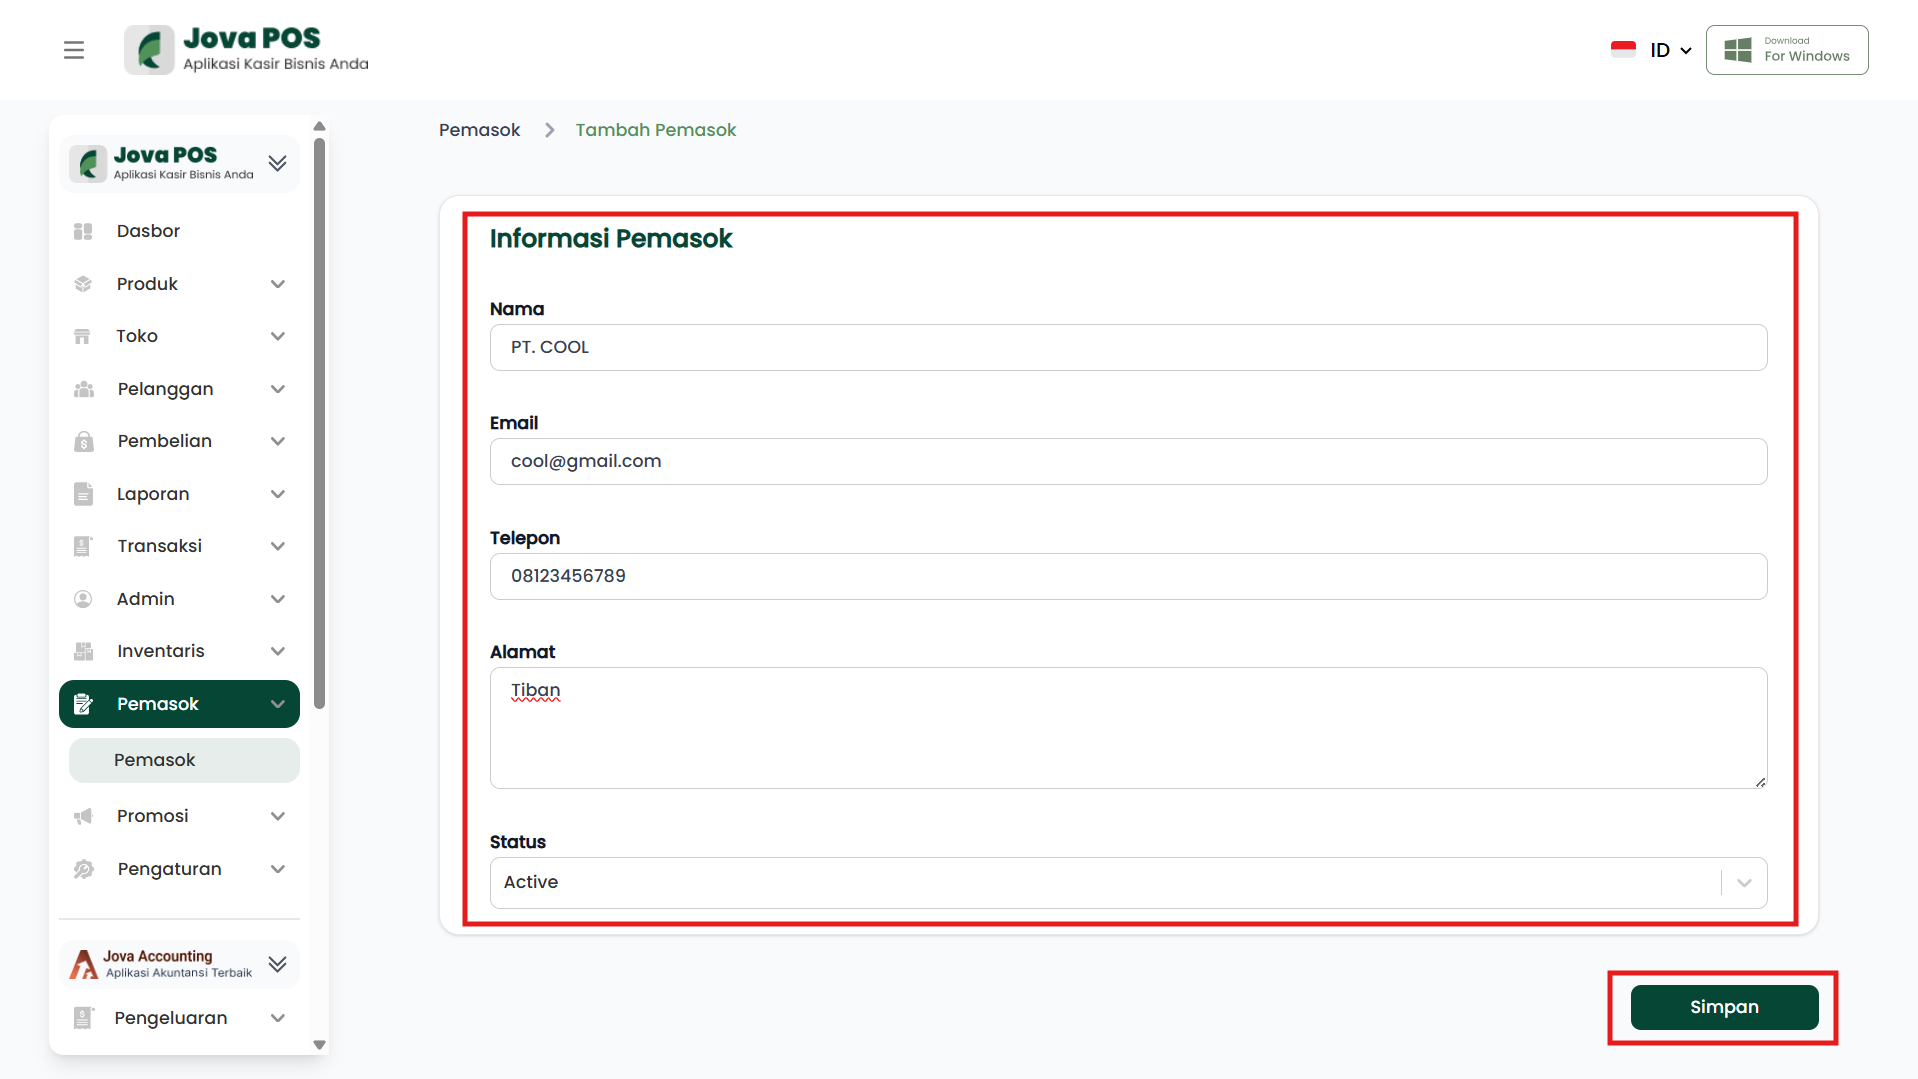
After filling in all required data, click Save to save the new supplier information.
3. Viewing Supplier List
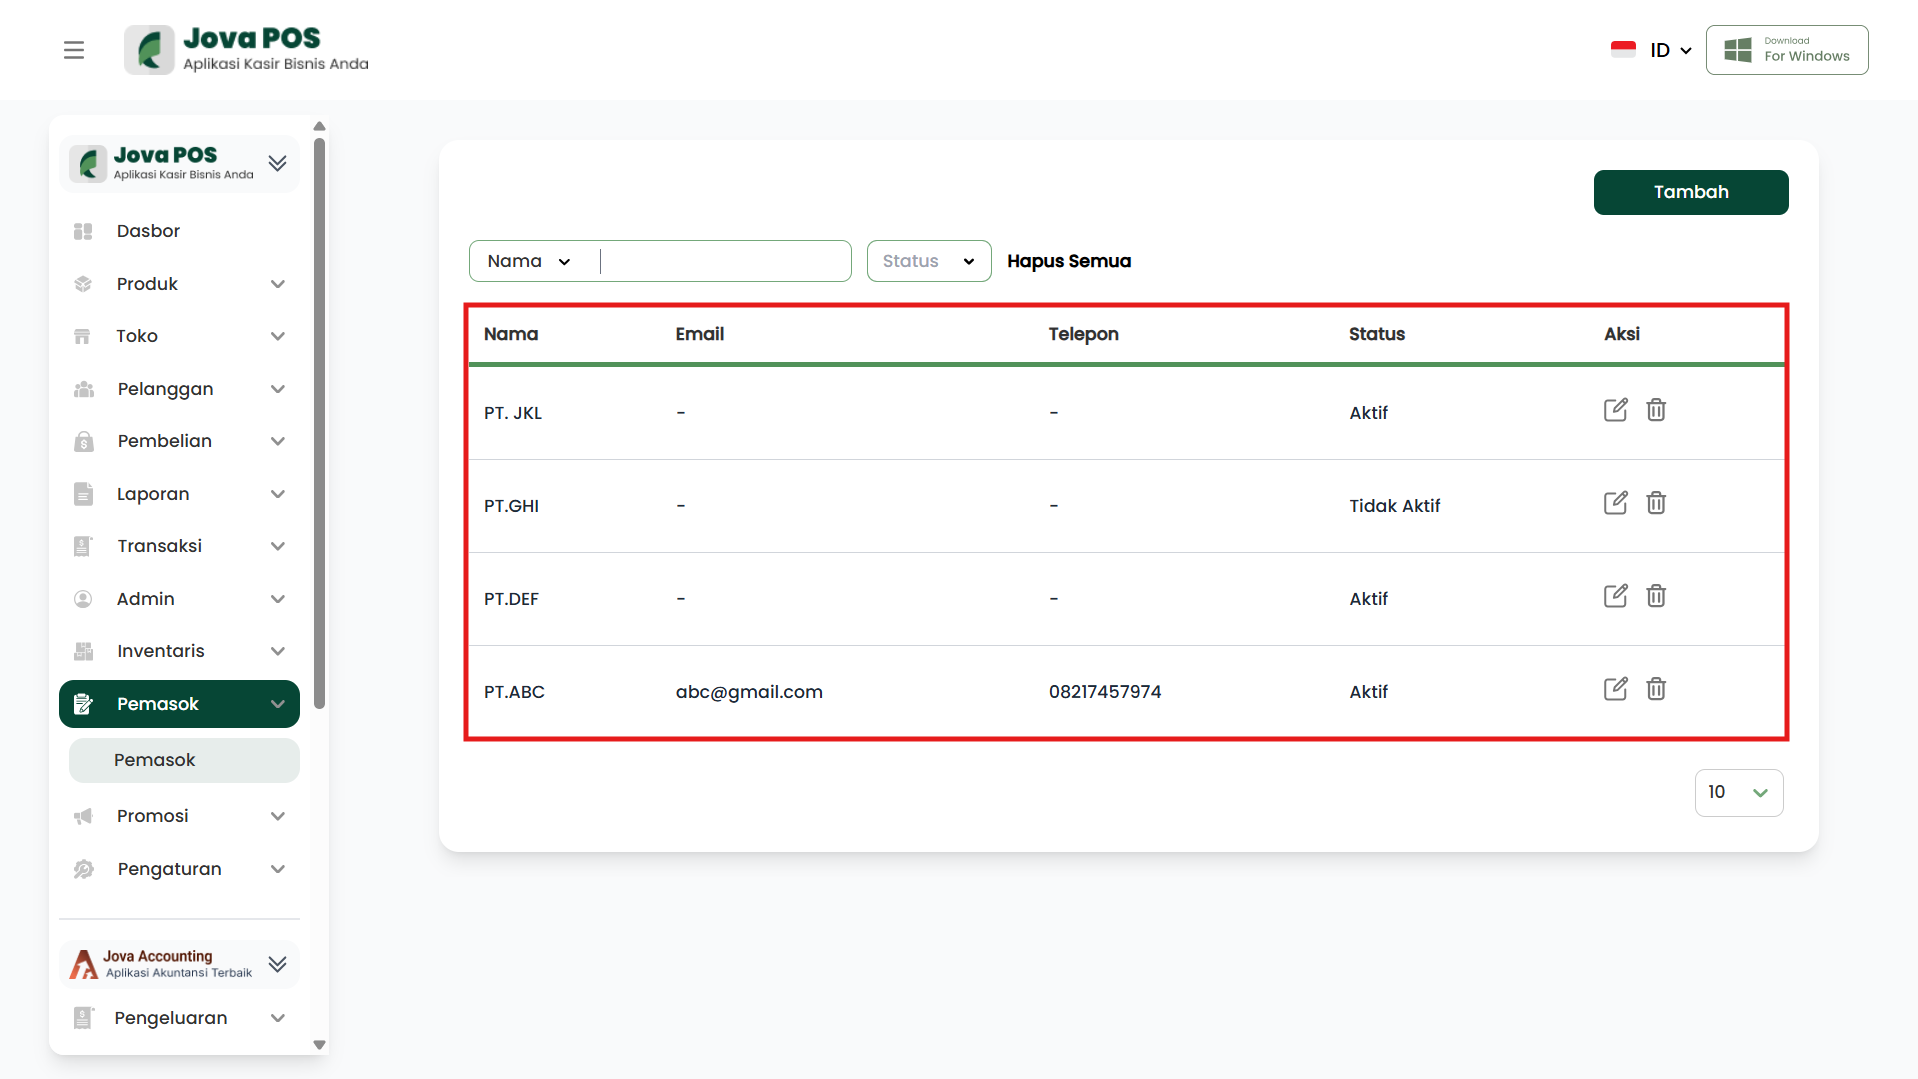
After successfully adding a supplier, you can view the list of all registered suppliers in the system. This list will display basic information about each supplier, such as name, email, phone, and status.
Supplier List View:
The supplier list will look like the image below, displaying:
- Supplier Name: The name of the registered supplier.
- Email: The supplier's email address.
- Phone: The supplier's phone number.
- Status: Whether the supplier is active or not.
- Action: Options to edit or delete the supplier.
4. Editing a Supplier
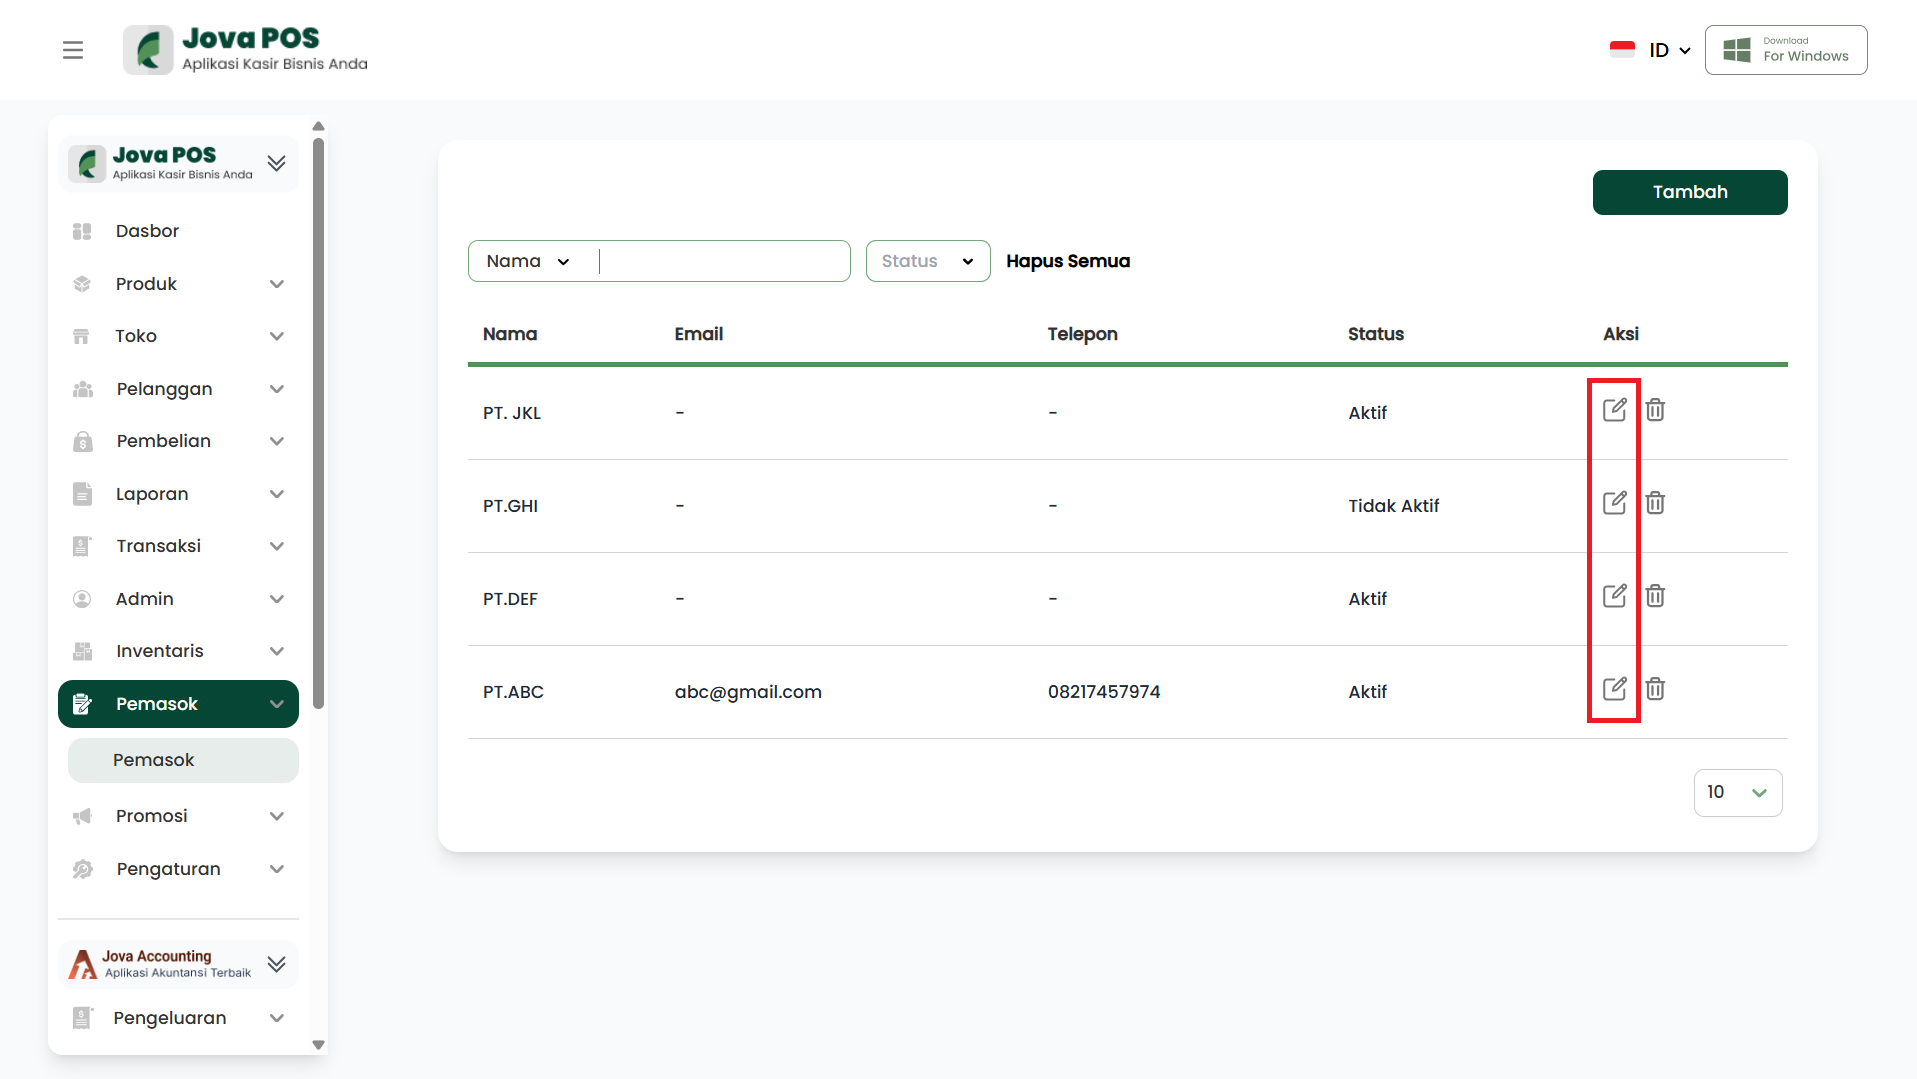
If you want to update supplier information, you can click the Edit button in the Action column of the supplier list. You can update data such as name, email, or supplier status.
Edit Button View:
The edit button allows you to change existing supplier data.
5. Deleting a Supplier
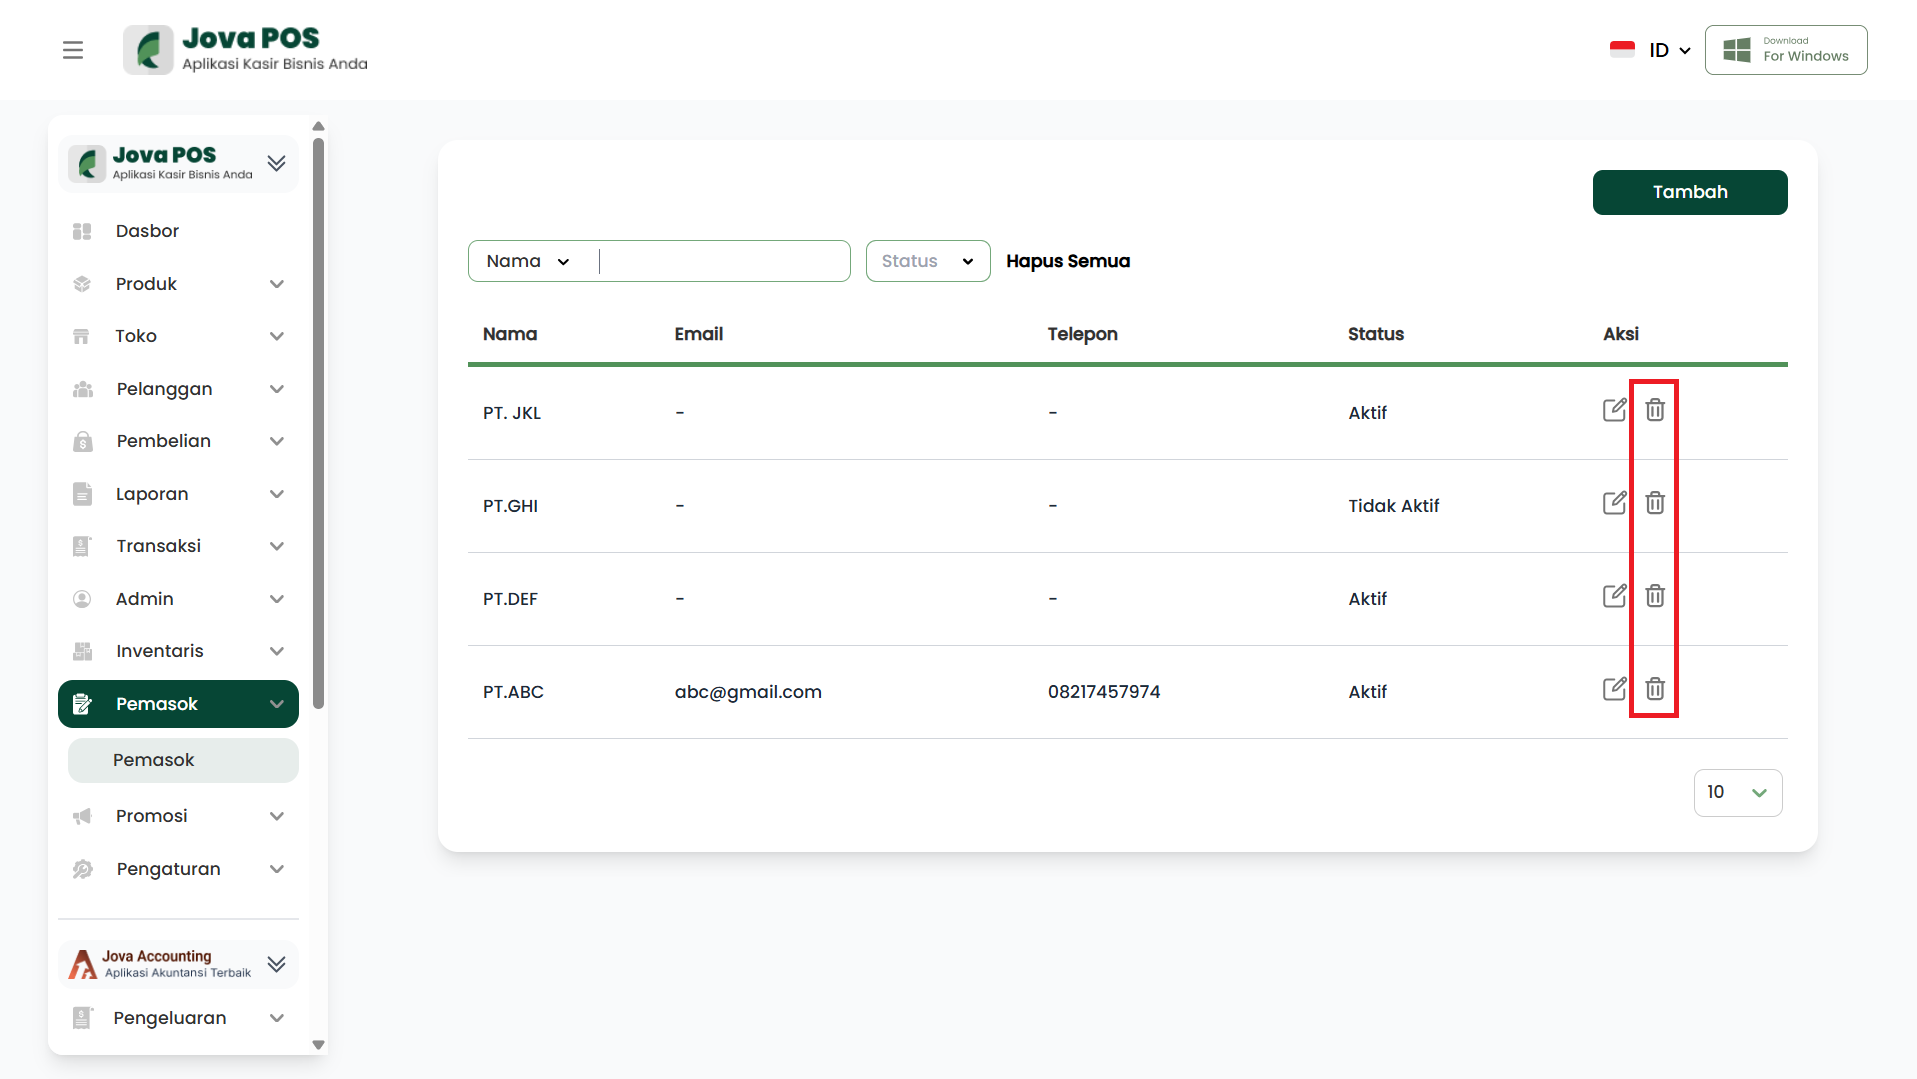
If a supplier is no longer active or needs to be removed from the system, you can click the Delete button in the Action column of the supplier list. The system will ask for confirmation to ensure you want to delete the supplier.
Delete Button View:
Make sure to check carefully before deleting a supplier as this action cannot be undone.
6. Searching for Suppliers
On the supplier list page, you can use the search feature to find suppliers by Name or Status. Simply enter a name or select a supplier status to filter the displayed supplier list.
Supplier Filter View:
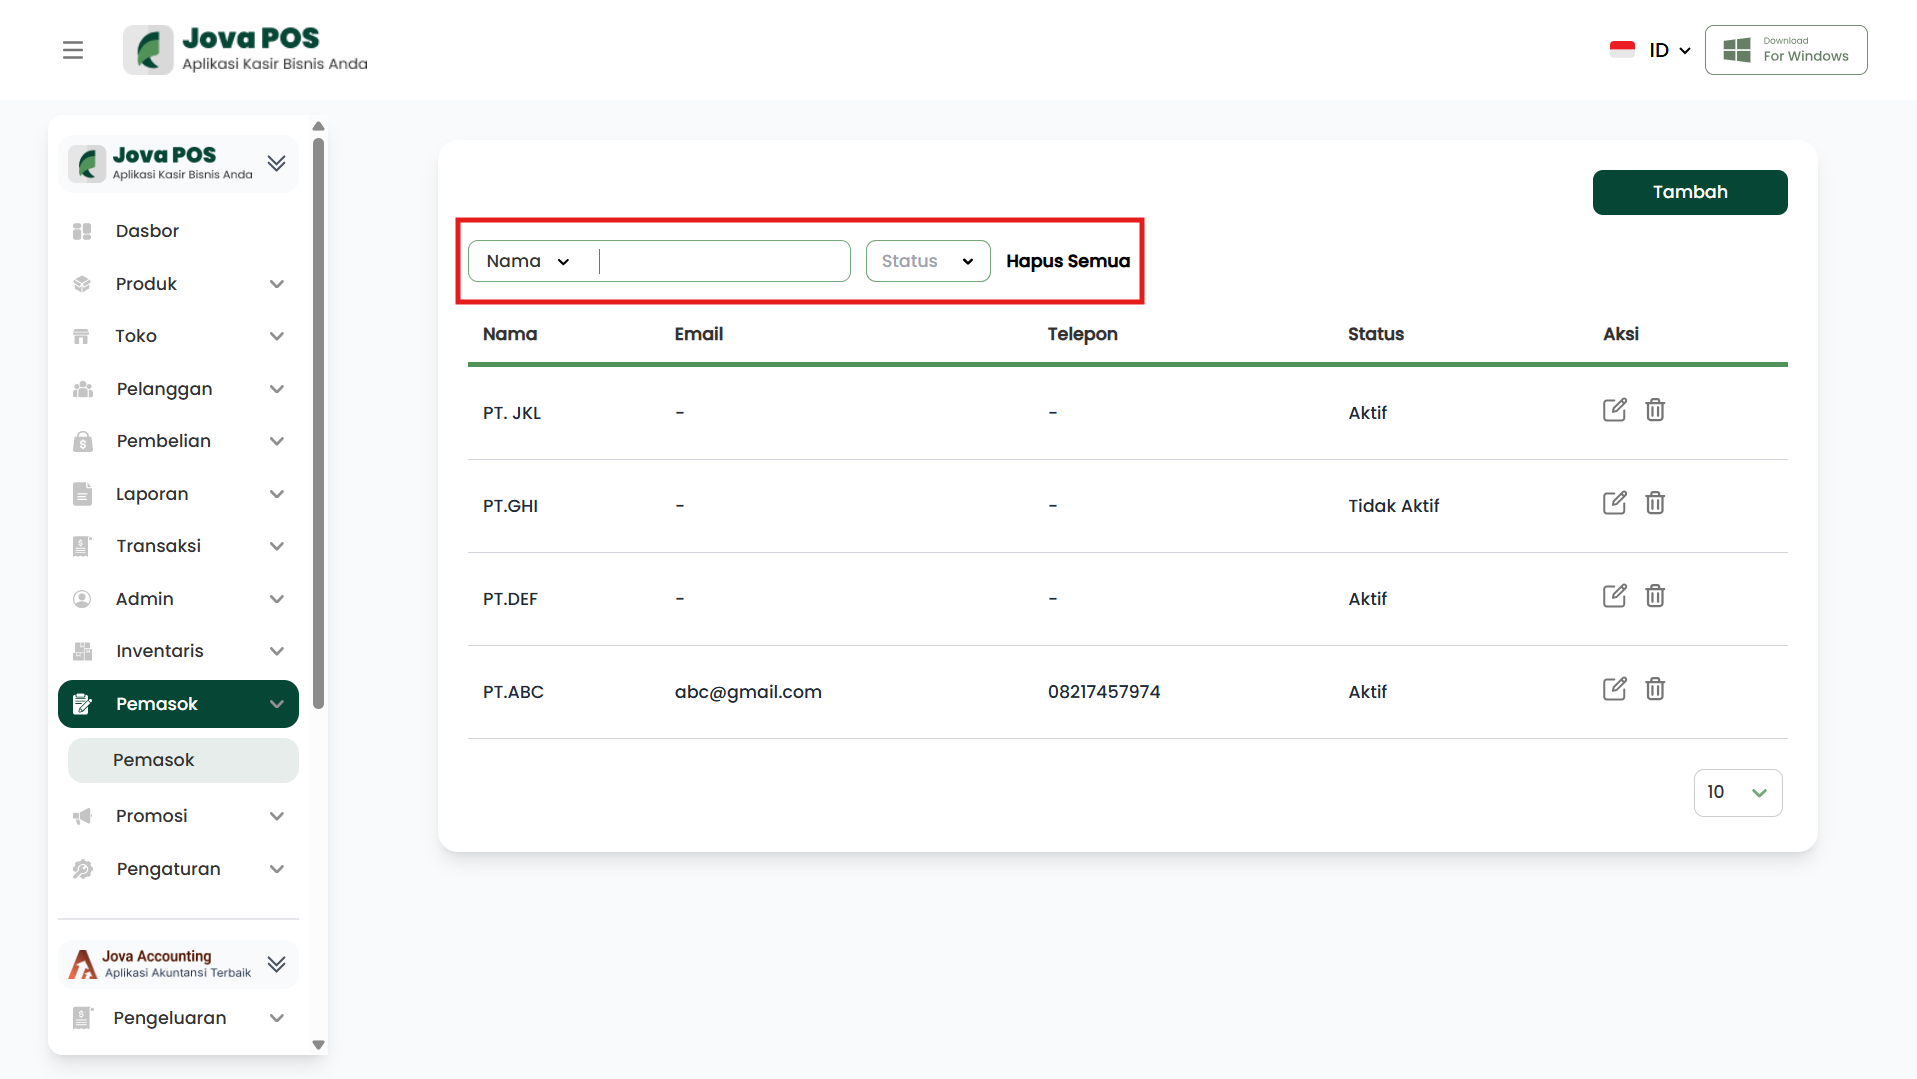
You can filter the supplier list by name or status to speed up the search.
7. Updating Supplier Status
You can update supplier status at any time. If a supplier is no longer partnering, you can change their status to Inactive. This helps you keep data relevant and organized.
Conclusion
By using the Suppliers feature in Jova POS, you can easily add, edit, delete, and manage your supplier data. Make sure to always update supplier information and add important notes to facilitate future transactions.